¶ 2 Getting Started
This section provides a step-by-step introduction to using the robot for the first time.
It covers the essential procedures required to safely start operating the robot, including powering on the system, checking hardware status, establishing network or controller connections, and verifying that the robot is ready for operation.
You will also learn how to perform basic operations such as manual control, monitoring robot status indicators, and confirming that key subsystems (sensors, communication, and motion control) are functioning correctly.
This section is intended to help users quickly transition from unpacking the robot to performing their first successful operation. test
Info:
It is strongly recommended to review the Safety Guidelines section before operating the robot for the first time. Please refer to the Safety Guidelines for important safety information and operating precautions.
¶ 2.1 Power On/Off
Press the power button to start the robot.
|
|
During startup, the status LED will blink green, indicating that the system is booting. Booting may take some seconds. Once the startup process is complete, the LED will turn green, indicating that the robot is ready for operation.
Press it again to turn the robot off.
¶ 2.2 Charge
Insert the supplied charging cable into the robot charging port to start charging.
While charging, the robot must remain stationary and cannot be moved.
|
|
¶ 2.3 Emergency Button
Press the emergency stop button to immediately stop all robot motion.
|
|
When the emergency stop is activated, the status LED changes from green to red, indicating that the robot is in emergency stop mode.
While in emergency stop mode:
- Robot motion is disabled
- Motor power is disconnected
- The robot cannot receive control commands
To resume operation, rotate the emergency stop button to release it.
After release, the LED returns to green, indicating normal operating state.
¶ 2.4 Manual Control
Warning:
Make sure the robot is disconnected from the charger before operating.
Turn on the joystick controller to start manual control.
The controller will automatically connect to the robot.
Once the connection is successful, the controller status LED will turn light green. Press and hold the L1 button to enter manual control mode.
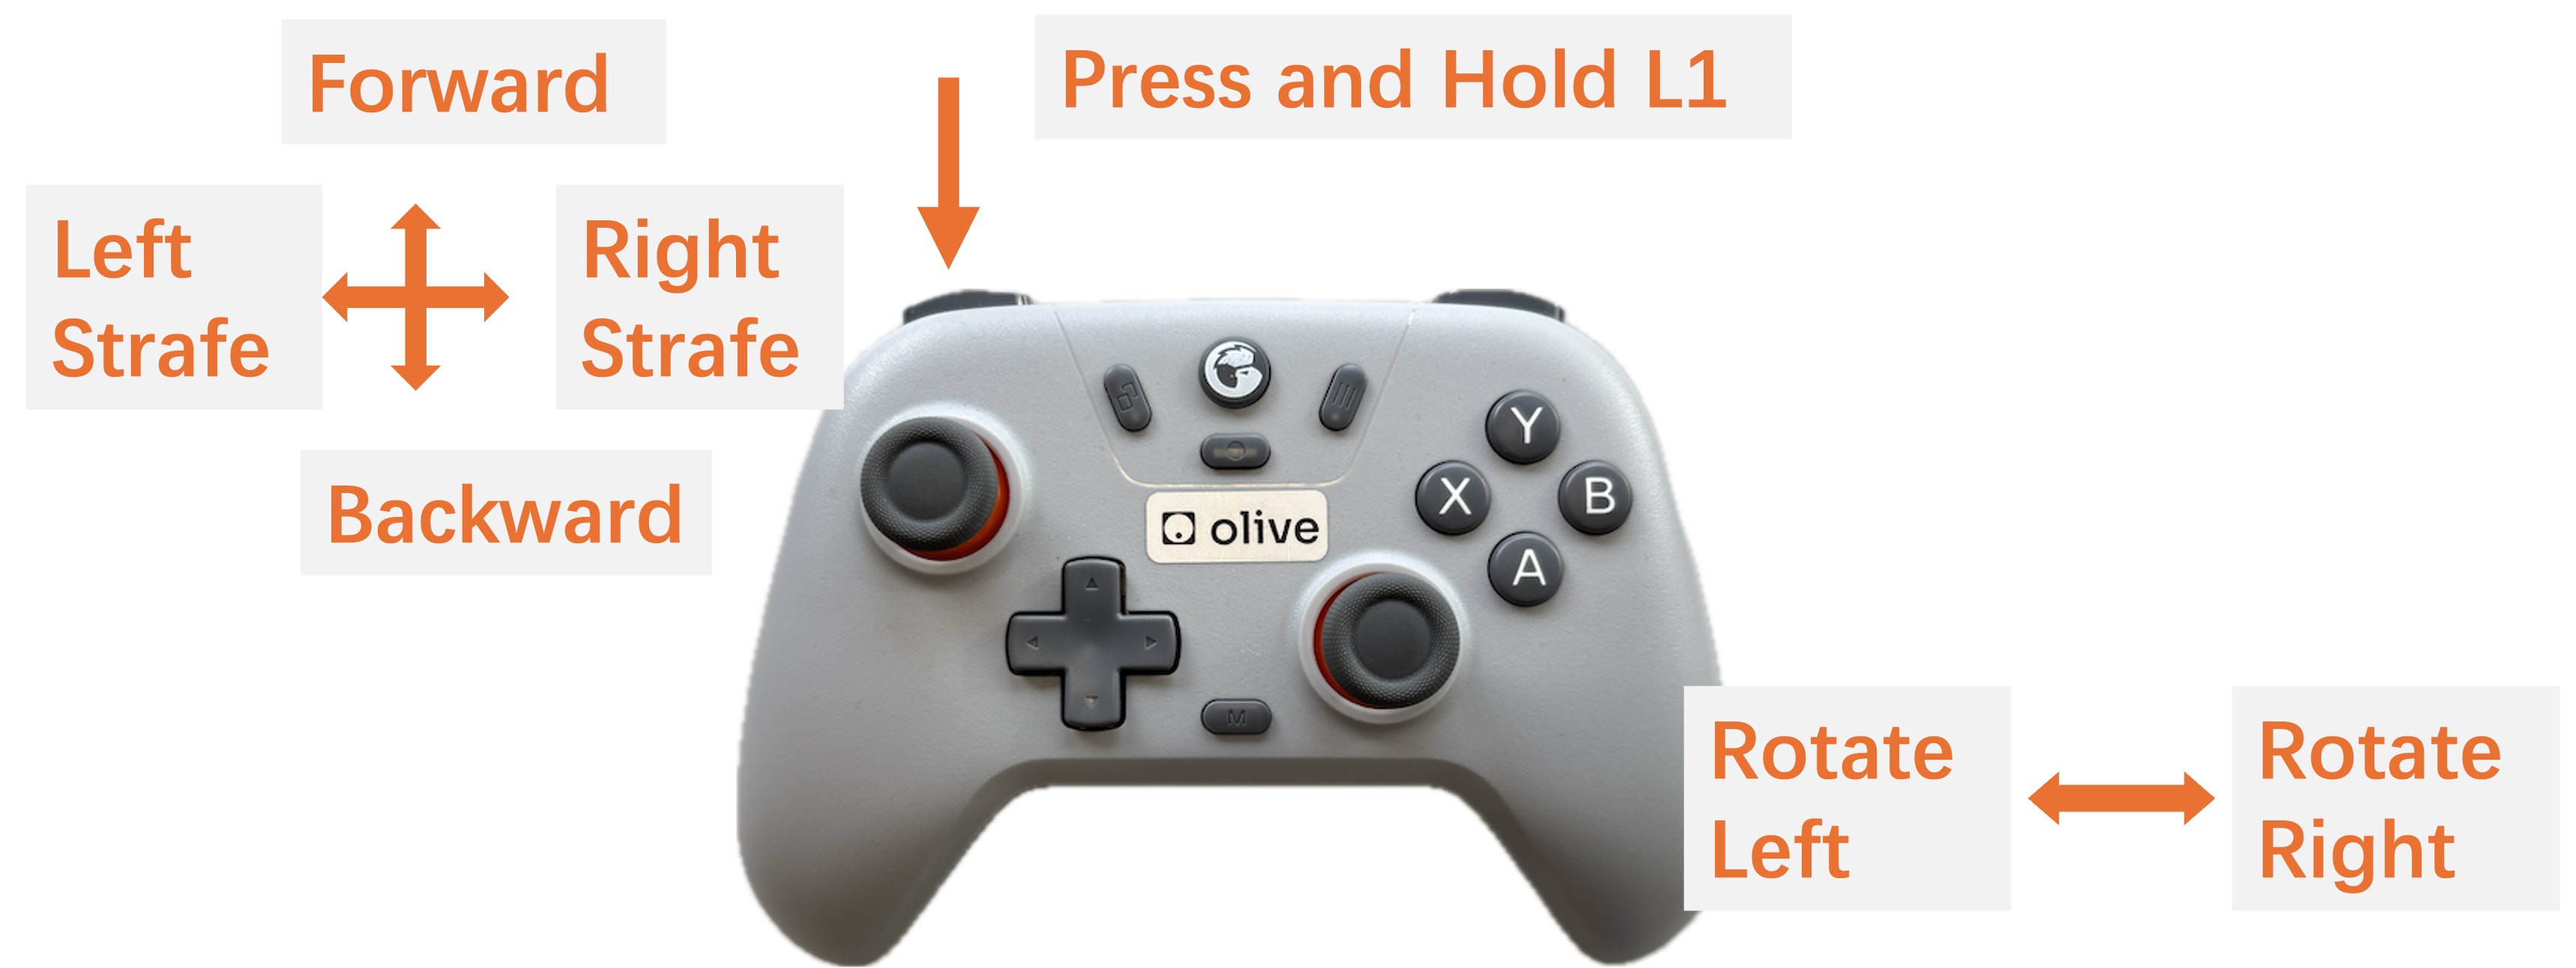 |
| Robot Motion Control Mapping |
When manual control mode is active, the robot status LED will turn blue.
During manual control:
- The left joystick (left/right) controls forward/backward movement and lateral movement (side-to-side).
- The right joystick controls robot rotation.
|
|
¶ 2.5 Initial Setup
In this section you will see an initial setup. How to access the Web-UI of ANT1 and how to subscribe and publish to ANT1 Topics.
|
|
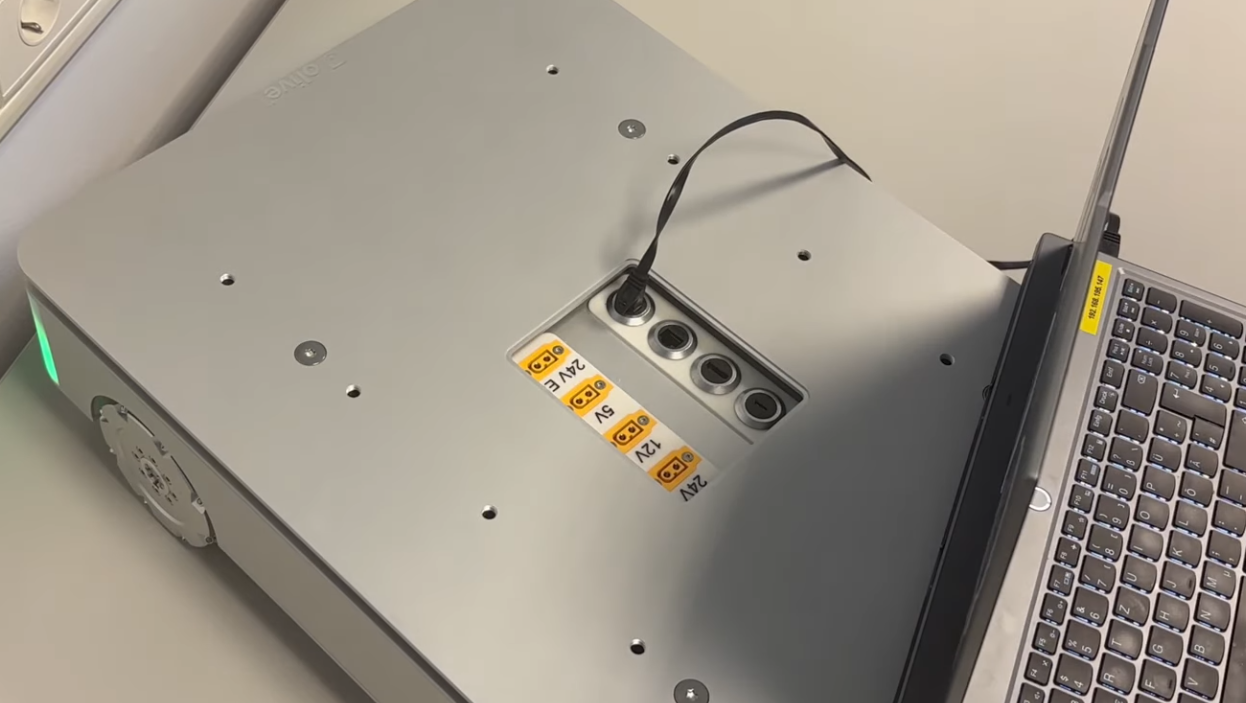
- Connect a Laptop with the outer LAN interface of the robot. This interface has a default Static IP of 192.168.7.100/24
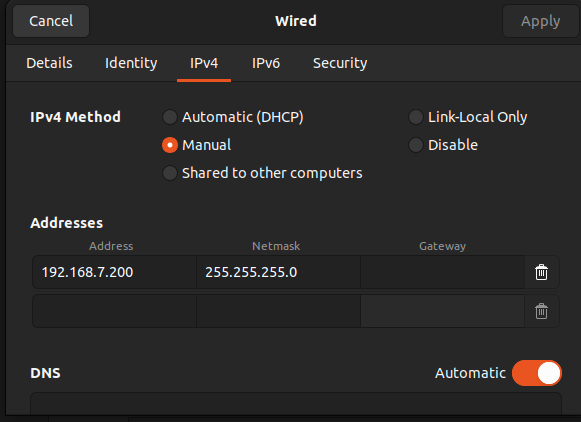
- Set a static IP of your Host to 192.168.7.200/24
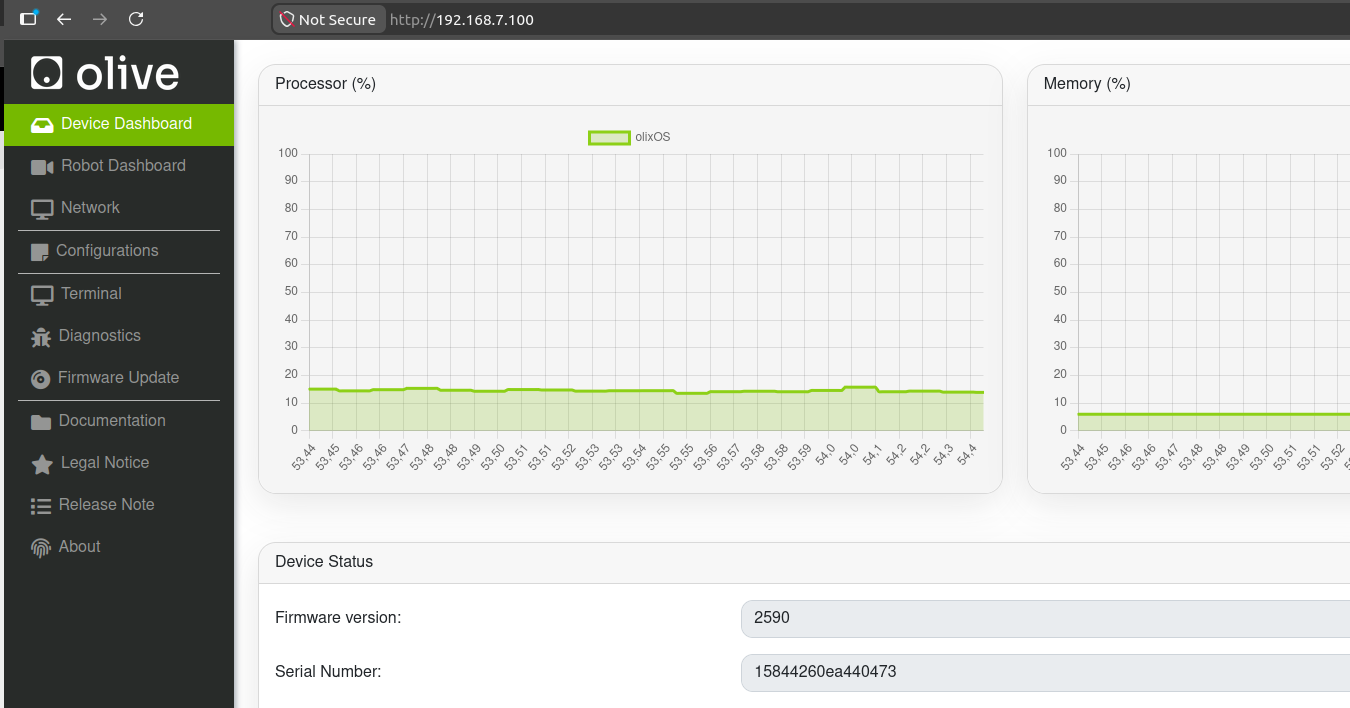
- The ANT1 Web UI is now available at 192.168.7.100. From there, you can access different areas, including the Device Dashboard and Network Dashboard. For more information, please refer to the Web-UI Section.
- To access the ROS 2 topics, you first need to set up Cyclone DDS on your host system, as the ANT1 uses Cyclone DDS by default.
# Install and Set Cyclone DDS
sudo apt install ros-humble-rmw-cyclonedds-cpp
export RMW_IMPLEMENTATION=rmw_cyclonedds_cpp
# To make Cyclone DDS permanent as default DDS add it into the bashrc
echo export RMW_IMPLEMENTATION=rmw_cyclonedds_cpp >> ~/.bashrc
# Restart ros2 daemon and set Domain-ID to 0
ros2 daemon stop
ros2 daemon start
export ROS_DOMAIN_ID=0
# Check the ROS2 topics
ros2 topic list Hint:
ROS 2 can be very sensitive to network changes. In particular, when the currently preferred network interface (for example Ethernet/LAN) suddenly becomes unavailable and the system falls back to another interface, ROS 2’s discovery mechanism may stop working correctly. In these cases, ROS 2 topics can appear “stuck” and no messages are shown anymore, even though the nodes are still running.
If you encounter this Issue kill the ros2 daemon and restart it with following commands:
pgrep -f "ros2cli.daemon|ros2-daemon" | xargs -r kill -9
rm -rf ~/.ros/daemon
ros2 daemon start
- If everything is configured correctly, the topics should appear, and you can subscribe to them or publish messages.
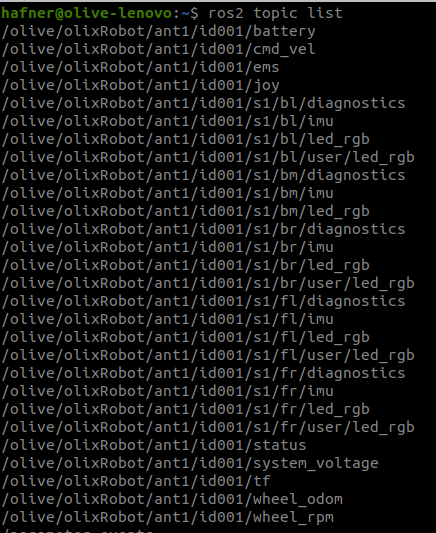
Use following command to subscribe to the /olive/olixRobot/ant1/id001/tf
$ ros2 topic echo /olive/olixRobot/ant1/id001/tf Use following command to change the back-left corner LED from green to red
ros2 topic pub /olive/olixRobot/ant1/id001/s1/bl/user/led_rgb std_msgs/msg/Float32MultiArray "layout:
  dim: []
  data_offset: 0
data: [1.0, 0.0, 0.0]"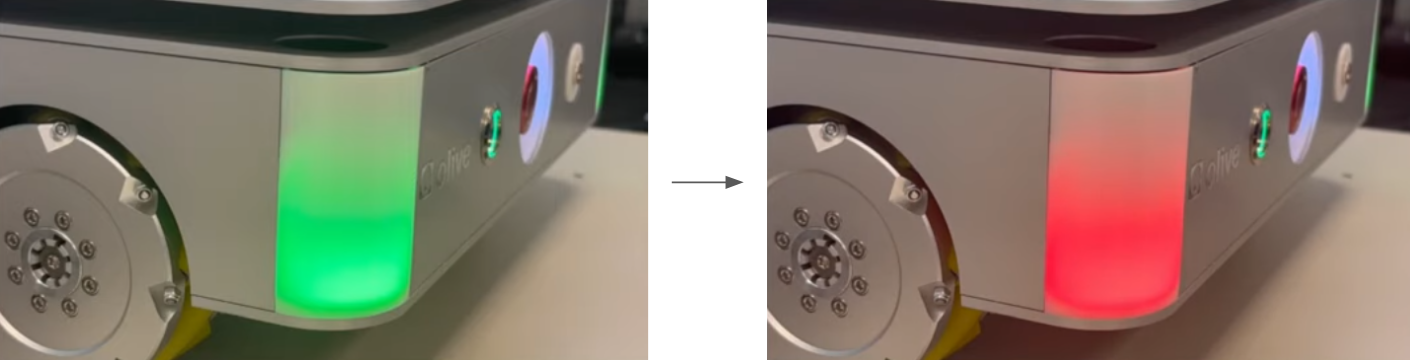
To get further information about the ROS2 API and the Web-UI please go to the Software Development Section